Autodesk How To Change Template Without Removing The Part - If a drawing and the corresponding assembly or part have. Begin in acc with a project template already created that you wish to edit. Go to options > files > template settings > default template file name for qnew. Save and replace issue in assembly with substitute. Once you create a project template, you can easily edit the template to meet changing needs. Use the simplify command to reduce the content within an assembly by removing components, features, and output a simplified part file. Now, you should have a drawing. Browse to your default template. Expand the project menu, select the templates tab, and click view all. Insert the drawing sent to you without your stuff in it into the new drawing based on your template.
Go to options > files > template settings > default template file name for qnew. Begin in acc with a project template already created that you wish to edit. Insert the drawing sent to you without your stuff in it into the new drawing based on your template. Expand the project menu, select the templates tab, and click view all. Once you create a project template, you can easily edit the template to meet changing needs. Save and replace issue in assembly with substitute. Browse to your default template. Use the simplify command to reduce the content within an assembly by removing components, features, and output a simplified part file. Now, you should have a drawing. If a drawing and the corresponding assembly or part have.
If a drawing and the corresponding assembly or part have. Once you create a project template, you can easily edit the template to meet changing needs. Use the simplify command to reduce the content within an assembly by removing components, features, and output a simplified part file. Expand the project menu, select the templates tab, and click view all. How to change a part or assembly that an inventor drawing uses as a reference. Save and replace issue in assembly with substitute. Browse to your default template. Go to options > files > template settings > default template file name for qnew. Now, you should have a drawing. Insert the drawing sent to you without your stuff in it into the new drawing based on your template.
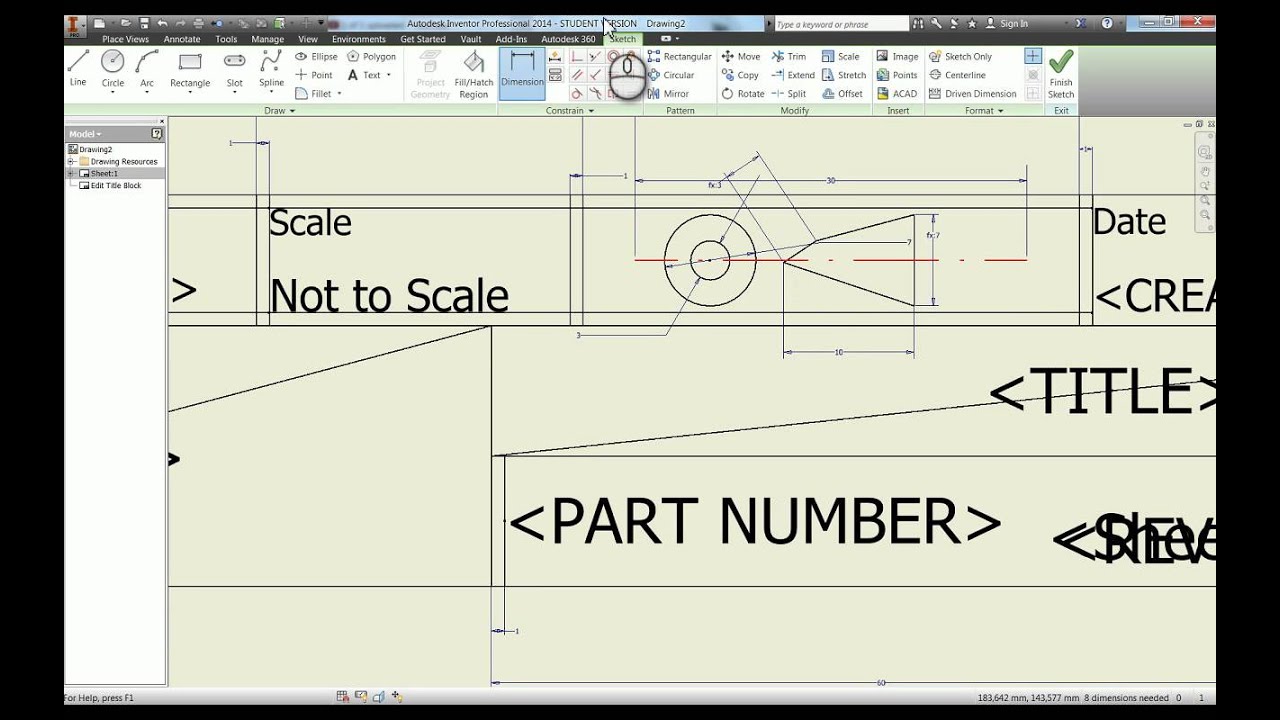
Creating Your Own Drawing Template in Autodesk Inventor Tutorial YouTube
Begin in acc with a project template already created that you wish to edit. How to change a part or assembly that an inventor drawing uses as a reference. Expand the project menu, select the templates tab, and click view all. Go to options > files > template settings > default template file name for qnew. Once you create a.
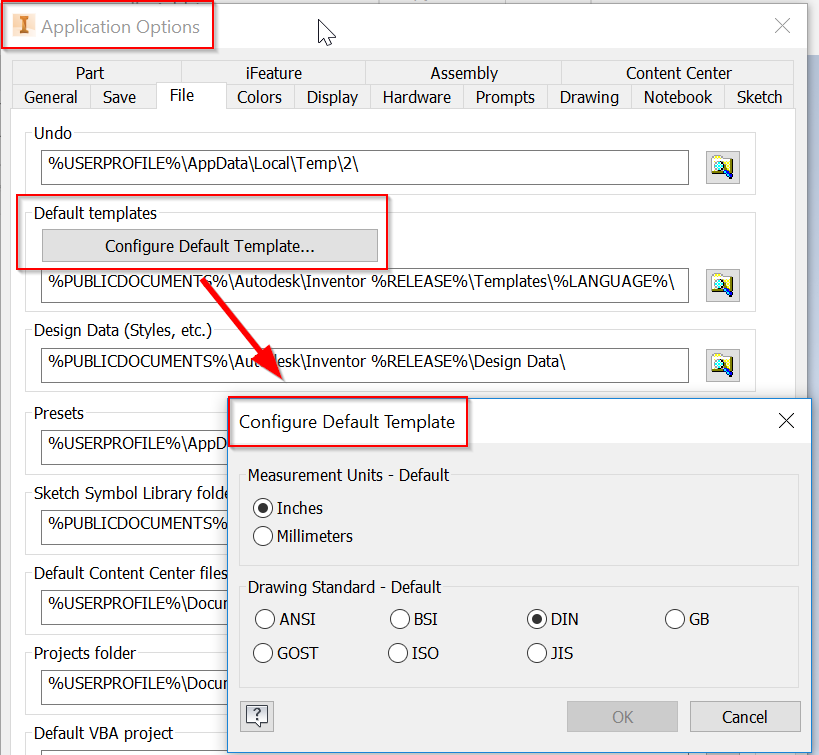
What does the function 'Configure Default Template' in the Inventor
How to change a part or assembly that an inventor drawing uses as a reference. Browse to your default template. Once you create a project template, you can easily edit the template to meet changing needs. Save and replace issue in assembly with substitute. Now, you should have a drawing.

Change Template Drawing Inventor at Gordon Glazer blog
Begin in acc with a project template already created that you wish to edit. Use the simplify command to reduce the content within an assembly by removing components, features, and output a simplified part file. Save and replace issue in assembly with substitute. Browse to your default template. How to change a part or assembly that an inventor drawing uses.
Help
Expand the project menu, select the templates tab, and click view all. Insert the drawing sent to you without your stuff in it into the new drawing based on your template. Go to options > files > template settings > default template file name for qnew. If a drawing and the corresponding assembly or part have. Save and replace issue.

Solved How change template of background?? Autodesk Community
If a drawing and the corresponding assembly or part have. Once you create a project template, you can easily edit the template to meet changing needs. Expand the project menu, select the templates tab, and click view all. Go to options > files > template settings > default template file name for qnew. Begin in acc with a project template.

Solved How change template of background?? Autodesk Community
Expand the project menu, select the templates tab, and click view all. Insert the drawing sent to you without your stuff in it into the new drawing based on your template. Use the simplify command to reduce the content within an assembly by removing components, features, and output a simplified part file. How to change a part or assembly that.

Changing template from imperial to metric Autodesk Community
If a drawing and the corresponding assembly or part have. Once you create a project template, you can easily edit the template to meet changing needs. Go to options > files > template settings > default template file name for qnew. Browse to your default template. Now, you should have a drawing.
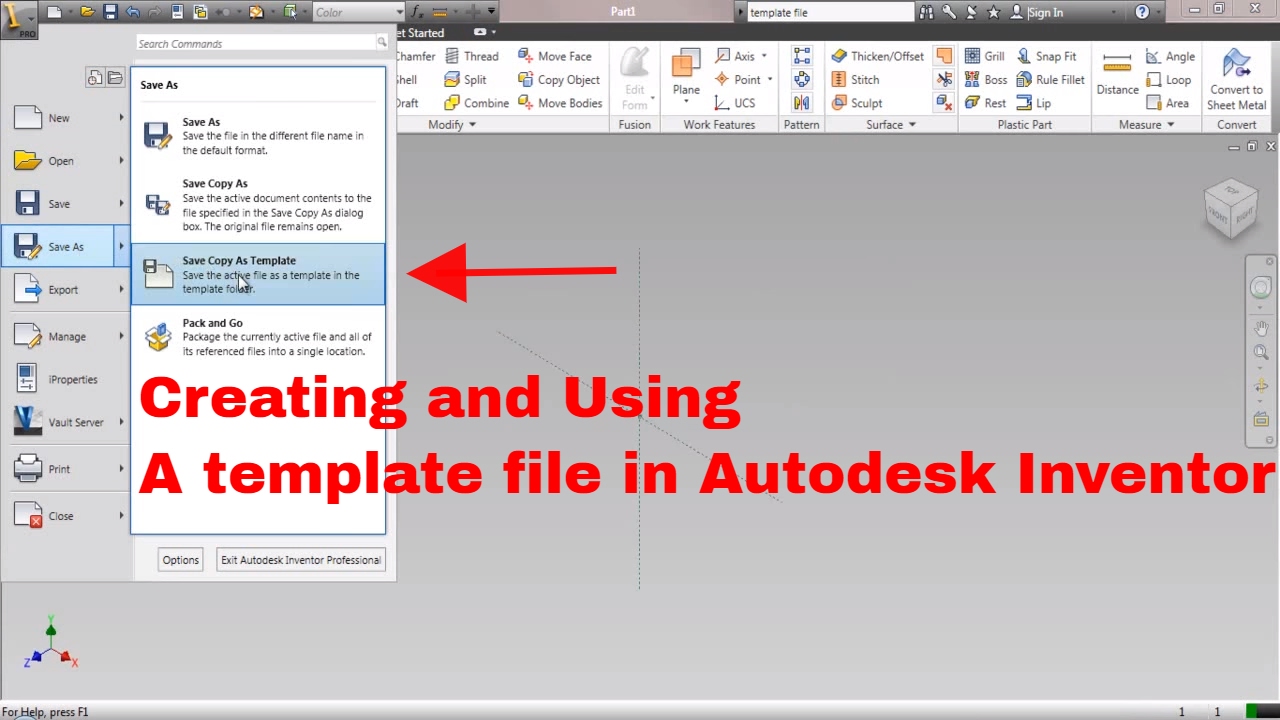
Creating and using a template file in Autodesk Inventor YouTube
If a drawing and the corresponding assembly or part have. Go to options > files > template settings > default template file name for qnew. Insert the drawing sent to you without your stuff in it into the new drawing based on your template. Once you create a project template, you can easily edit the template to meet changing needs..

Changing Templates Autodesk Inventor 2016 Templates from Imperial to
Go to options > files > template settings > default template file name for qnew. Use the simplify command to reduce the content within an assembly by removing components, features, and output a simplified part file. How to change a part or assembly that an inventor drawing uses as a reference. Insert the drawing sent to you without your stuff.

changing a .rte (template file) to a .rvt projevt file. Autodesk
Go to options > files > template settings > default template file name for qnew. Expand the project menu, select the templates tab, and click view all. Begin in acc with a project template already created that you wish to edit. Use the simplify command to reduce the content within an assembly by removing components, features, and output a simplified.
Browse To Your Default Template.
Go to options > files > template settings > default template file name for qnew. Save and replace issue in assembly with substitute. Begin in acc with a project template already created that you wish to edit. Now, you should have a drawing.
Use The Simplify Command To Reduce The Content Within An Assembly By Removing Components, Features, And Output A Simplified Part File.
Once you create a project template, you can easily edit the template to meet changing needs. Insert the drawing sent to you without your stuff in it into the new drawing based on your template. Expand the project menu, select the templates tab, and click view all. If a drawing and the corresponding assembly or part have.